Baby Monster Hat

Baby Monster Hat
Monster hat- picture by Stacy's Photography

Thursday, February 28, 2013

Crochet Boy Loafers A


Alright, so baby booties is something I am new at so I based this pattern from one I got from ravelry. 

This is the link http://www.loopyjess.co.uk/2012/03/bootie-pattern-version-2. 

I did make some changes  that worked better for me.  After the row that you work in back loops only I began to sc2tog in order to make the top tighter.  Mine just wasn't coming out tight enough and so I sc2tog on each side of every row that I went up. 

I also added an extra 2 rows of the dc to get it further up the shoe, since I obviously did not do a button strap.  For the strap I ch 13, sc 2nd from the hook.  sc 12, *ch1 turn, sc  12,*  for as many rows to make it as deep as your shoe needs.  I stitched them to the shoe and added buttons.

 I really think I could have tightened them even more.  So play with it and maybe dc2tog for another row.  This will make more sense as you read the pattern.

This is just my adapted version.  I have a couple of projects right now, but I plan on making another loafer bootie with my own pattern that will hopefully be of more help. 

Friday, February 22, 2013

Crochet little girl newsboy hat pattern

Okay, so this pattern is just based on memory, so it is very basic and requires some crochet knowledge in order to understand.

I made this pattern for adult and child, but I sold the child size to a neighbor so I can only reference my adult hat.  Here goes.

Ch 4, sl st together
Row 1:  CH1, SC in center loop 9 x (total 10) continue in a round
Row 2:SC 2 in next st around (total 20)
Row 3*HDC in next stitch, HDC twice in next st* around (total 30) 
Row 4*HDC in next 2 stitch, DC twice in next st* around (total 40)- for a baby this might be a good place to stop and start your puff stitches.
Row 5*HDC in next 3 st, HDC twice in next st* around (total 50) 
Row6*HDC in next 4 st, HDC twice in next st* around (total 60)
Row 7*HDC in next 5 st, HDC twice in next st*around (total 70)-  (You are going to have to make adjustments to # of st, because I am not going to even pretend to remember what I did exactly.  Also, this can be adjusted depending on the head size and how far you want the hat to come forward.)
Now this is where I don't know the number of stitches.  Create any puff type stitch or cluster.  I think Row 8-10 I crochet dc3tog in the same st. around. I think I did it for 3 rounds. (this should not actually decrease the stitch count)
Row 11 *HDC in next 5 st, HDC2tog in next st* around (60)
Row 12*HDC in next 4 st, HDC2tog in next st* around (50)  (this is my hat size when I use the HDC- yours may vary so please adjust up or down until you get a size that fits for you.
Row 13-15*HDC around for next 2 or 3 rows.  Depending on what you need.

Now make a hat brim.  I do them different all the time, depending on what I need, so here is just a quick reference.
Ch 25, Ch1 sc in second ch from hook (count as first st).  sc 23 x more.  ch1 turn.   sc, sc2tog, sc 18 x, sc2tog, sc.  ch1 turn, sc, sc2tog, sc 16x, sc2tog, sc.  ch1 turn, sc, sc2tog, sc 14x, sc2tog, sc. ch1 turn, sc, sc2tog, sc 14x, sc2tog, sc.  Put wrong sides together and stitch the bill to the hat.

Make a rectangle (I totally just had mom-brain and forgot what they are called).  ch 31, turn, sc in second ch from hook now and throughout) sc down.  *Ch1, turn sc in second ch from hook now and throughout) sc down.* Repeat three more times.  leave a long tail and use that to stitch to the hat above the brim. 

Make your favorite flower. attach to the edge of your rectangle thing.  (when I remember what it is called I will fix this, but for now just laugh)- A button would also be cute here.  Weave in all your ends and you are done. 

Hopefully this at least gave you some ideas to go from.


 For the pink hat, I separated my textured st.  I did row 1-3 the same, then I did row 8.  Continue with rows 5 and 6 (take special notice and add or decrease hdc in order to get the right stitch look.  I purposely made mine lumpy because i like that look. Do row 8 again, Do row 7 3 times, or row 7 then hdc around, Row 8, then rows 11-15.  (or something like that)
 
Sorry this is such a crazy pattern, but I was not in the habit of writing them down.  When I remake my hats, I will write it down and correct any mistakes.  Enjoy and hopefully you can at least get a base idea of what you can do.


Wednesday, February 20, 2013

Crochet Cowl (or circle scarf) pattern


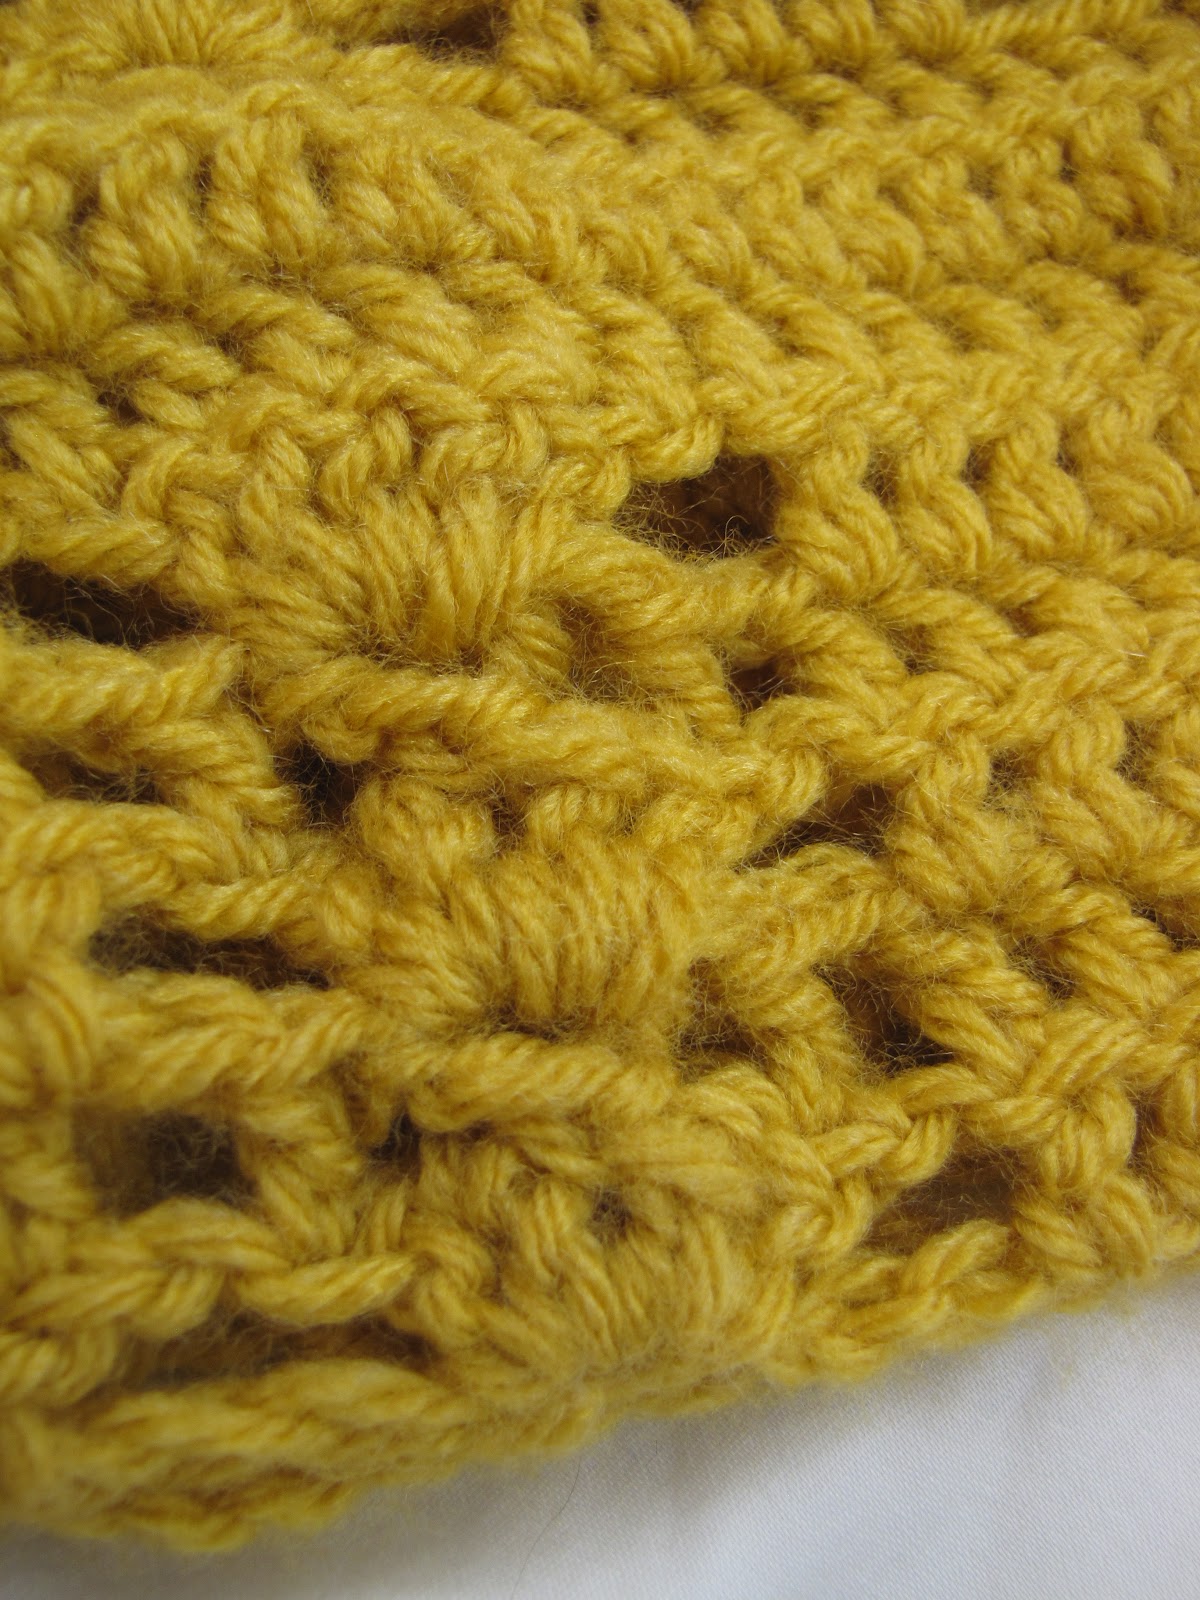
Double-up stitch cowl


Stitches to know

Ch

DC

FPtr –front post treble


I used an I hook.  Your hook size just depends on how thick you want the cowl to look, If you want it tighter than use a smaller hook size,


CH 108 +3


Row 1- this will be the wrong side-

          DC in 4th ch from hook (count as first DC). 

DC in next 2 st.  Ch1, skip 3 ch. 

DC  x5 in next st.  Ch 1, skip 3 ch.

*DC in next 5 st.  Ch 1, skip 3 ch 

DC  x5 in next st.  Ch 1, skip 3 ch.*

Repeat from *7 times Ch 1. skip 3 ch.  DC in last 3 st.

(note:  on mine I counted wrong and so I have an extra 3 stitches.  If this happens to you, don’t stress, just make adjustments to look nice)


Row 2

          Ch 3, turn (count as first DC, now and throughout)

          DC in next 3 DC sp. (unless you had extra or short DC’s just DC in the DC spaces)Ch1

DC in first DC of cluster.  Skip 2 DC.  FPtr in 4th DC in cluster.  FPtr in front of previous FPtr in 2nd DC in cluster. DC in 5th DC in cluster, Ch 1.

*DC in next 5 DC.  Ch1

DC in first DC of cluster.  Skip 2 DC.  FPtr in 4th DC in cluster.  FPtr in front of previous FPtr in 2nd DC in cluster. DC in 5th DC in cluster, Ch 1. *  Repeat from * 7 times

DC in remaining DC spaces.


Row 3

          Ch3, turn

DC in next 2 st.  Ch1, skip 3 ch. 

DC  x5 in space between FPtr.  Ch 1, skip 3 ch.

*DC in next 5 st.  Ch 1, skip 3 ch 

DC  x5 in space between FPtr.  Ch 1, skip 3 ch.*

Repeat from *7 times Ch 1. skip 3 ch.  DC in last 3 st.


Row 4-5

          Repeat Row 2 and 3

Row 6-8

          Ch3, turn

          DC across

Row 9

          Ch3, turn

DC in next 2 st.  Ch1, skip 3 ch. 

DC  x5 in next st.  Ch 1, skip 3 ch.

*DC in next 5 st.  Ch 1, skip 3 ch 

DC  x5 in next st.  Ch 1, skip 3 ch.*

Repeat from *7 times Ch 1. skip 3 ch.  DC in last 3 st.

Row 10

          Ch 3, turn (count as first DC, now and throughout)

          DC in next 3 DC sp. (unless you had extra or short DC’s just DC in the DC spaces)Ch1

DC in first DC of cluster.  Skip 2 DC.  FPtr in 4th DC in cluster.  FPtr in front of previous FPtr in 2nd DC in cluster. DC in 5th DC in cluster, Ch 1.

*DC in next 5 DC.  Ch1

DC in first DC of cluster.  Skip 2 DC.  FPtr in 4th DC in cluster.  FPtr in front of previous FPtr in 2nd DC in cluster. DC in 5th DC in cluster, Ch 1. *  Repeat from * 7 times

DC in remaining DC spaces.


Row 11

          Ch3, turn

DC in next 2 st.  Ch1, skip 3 ch. 

DC  x5 in space between FPtr.  Ch 1, skip 3 ch.

*DC in next 5 st.  Ch 1, skip 3 ch 

DC  x5 in space between FPtr.  Ch 1, skip 3 ch.*

Repeat from *7 times Ch 1. skip 3 ch.  DC in last 3 st.


Row 12-13

          Repeat row 10 and 11.


Put wrong sides together and (the 3 DC and 3 DC should line up) and stitch down the middle.  Weave in ends.


I hope this made sense to you.  If you find a mistake leave me a note so that I can address it.  Thanks and have a great day!


I based the double up crochet stitch from the book “Crochet Stitches” from the publishing company Leisure Arts.


Thursday, February 14, 2013

DIY Wrapping Paper Wreath

My husband really created this for a competition at work and it is awesome. 

1.First cut strips of wrapping paper (we choose 8 matching papers) into roughly 8x11 papers.

2. Roll the paper around a pencil, (we kept it tighter and the bottom) and tape into place.

3. Cut diagonally at different lengths.  (keep them pretty long it hides  the card board better)

4. Cut yourself a donut shaped card board piece.

5.  Hot glue, in sections, the different tubes of wrapping paper.  (save the shorter ones for the front)

6.  Repeat for at least one row

7. Your done!  This is an amazing wreath! 


By the way, we won!

Crochet Little Girl Leggings Pattern

It drives me nuts when I see something cute and want to make it, but there is no pattern.  I am new at writing patterns, but I really don't mind sharing my ideas!  So here is a quick reference for my little girl leggings.


Color A

Ch 25-30 (depending on how big the ankle is)

SC one time around

Ch3 (first DC) DC around adding two extra DC somewhere in the mix)

Color B

Ch3 (first DC) DC around adding two extra DC somewhere in the mix)

Color A

Ch4 (first tr) TR around adding two extra TR somewhere in the mix)

Color B

Ch3 (first DC) DC around adding two extra DC somewhere in the mix)

(Add extra until it gets to a size that you want.  You might want to play with it and widen it sooner by adding extra stitches.  Really make this your own.  You can use HDC and DC instead.)

*Color A

Ch4 (first tr) TR around.

Color B

Ch3 (first DC) DC around* Repeat 2x

Color A

Ch4 (first tr) TR around decreasing two extra TR somewhere in the mix)

Color B

Ch3 (first DC) DC around adding two extra DC somewhere in the mix)

Color B

Ch3 (first DC) DC around adding two extra DC somewhere in the mix)

With color B

 *ch 7, skip 3 ch, sc in next* repeat around.  (adjust last group to fit,  may have ship 4 ch or only 2.)

Crochet any small flower and stitch on.

I know this is not an average pattern, but I really wanted to get this out.  I will improve as I go and actually write the pattern for my next set.  Hopefully this will get you set and going.  If nothing else just give you an idea.

Wednesday, January 2, 2013

HeartMade

This is a new service opportunity that I am heading up.  The idea is that you create a hat or blanket every month to donate to children in need.  Get together with a group of friends in your community and when you combine your work you will be amazed at the number of items you have to give away.